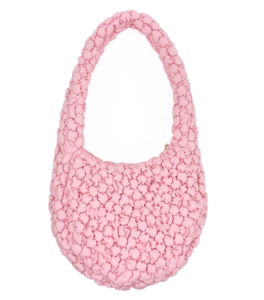
A cosmetic bag is a must-have for anyone who loves makeup or toiletries. It’s perfect for travel, organizing your everyday essentials, or just keeping your vanity tidy. While you can always buy one, making your own cosmetic bag is a fun and rewarding project. It allows you to customize the size, fabric, and design to perfectly suit your needs. Plus, it’s a great way to use up fabric scraps!

Materials You’ll Need
Fabric: Choose durable fabrics for the exterior and interior. Cotton, linen, canvas, or laminated cotton are good options. Consider using a waterproof fabric for the lining if you plan to store liquids.
Zipper: Select a zipper that’s the desired length of your bag’s opening. A slightly longer zipper is easier to work with.
Interfacing (Optional): Interfacing adds structure and stability to your bag. Use fusible fleece or a firm interfacing depending on the fabric you choose.
Scissors or Rotary Cutter
Ruler or Measuring Tape
Pins or Clips
Sewing Machine
Thread
Iron
Zipper Foot
Step-by-Step Instructions
1. Cut Your Fabric: Decide on the dimensions of your cosmetic bag. Cut two pieces of exterior fabric, two pieces of lining fabric, and two pieces of interfacing (if using) to the desired size.
2. Apply Interfacing (Optional): If using interfacing, fuse it to the wrong side of the exterior fabric pieces according to the manufacturer’s instructions.
3. Prepare the Zipper: Place one exterior fabric piece right side up. Place the zipper face down along the top edge of the fabric. Place one lining fabric piece on top of the zipper, right side down, creating a sandwich. Pin or clip all layers together.
4. Sew the Zipper: Using a zipper foot, sew along the edge of the fabric, close to the zipper teeth. Repeat steps to attach the other side of the zipper to the remaining exterior and lining fabric pieces.
5. Topstitch: Fold the fabric away from the zipper and press the seams. Topstitch along both sides of the zipper to give a clean finish and prevent the lining from catching in the zipper.
6. Assemble the Bag: Open the zipper halfway. Fold the exterior fabric pieces right sides together, and fold the lining fabric pieces right sides together. Ensure the zipper is centered. Pin or clip around all edges, leaving a 3-4 inch opening in the lining for turning.
7. Sew the Bag: Sew around all edges with a 1/2 inch seam allowance, backstitching at the beginning and end. Remember to leave the opening in the lining.
8. Box the Corners (Optional): To give your bag a flat bottom, box the corners. Fold each corner into a triangle, aligning the side seam with the bottom seam. Measure and mark a line across the corner, perpendicular to the fold. Sew along the line, and trim off the excess fabric.
9. Turn and Finish: Reach through the opening in the lining and turn the bag right side out. Use a point turner or chopstick to push out the corners. Fold in the edges of the opening in the lining and press. Topstitch the opening closed, or use a blind stitch for an invisible finish.
Tips for Success
Choose the Right Fabric: The fabric you choose will greatly impact the look and durability of your bag.
Use a Zipper Foot: A zipper foot allows you to sew close to the zipper teeth without any difficulty.
Take Your Time: Don’t rush the process. Accurate cutting and careful sewing will result in a professional-looking cosmetic bag.
Creating your own cosmetic bag is a simple project that can yield impressive results. Experiment with different fabrics, embellishments, and sizes to craft a unique accessory that perfectly suits your style and needs. Happy sewing!
You may also be interested in:
